

Building a home is perhaps the most significant investment you will ever make, both financially and emotionally. It is the transition from a set of blueprints to a sanctuary. While the prospect of a “never-been-lived-in” space is exhilarating, the road from the first selection to move-in day is a marathon, not a sprint.
Typically spanning anywhere from six months to over a year, the homebuilding process is a complex choreography of architects, tradespeople, inspectors, and suppliers. Understanding the sequence of events can help alleviate the construction fatigue that many buyers feel midway through the project.
Phase 1: Pre-Construction and the Psychology of Design
The journey begins long before a shovel touches the earth. This phase is characterized by intense decision-making. You will first select your homesite and your floor plan. Modern builders often offer structural flex options, such as choosing between a formal dining room and a home office.
Once the layout is set, you enter the design phase. This is often the most stressful yet rewarding part of the homebuilding process. You are tasked with choosing everything from the big-ticket items like cabinetry and flooring to the minute details like the finish on your cabinet hardware or the color of your grout.
While you are picking out granite slabs, the builder is working behind the scenes on engineering and permitting. This includes soil testing, structural engineering reviews, and securing permits from the local municipality. This stage can feel like a waiting game, but it is essential for ensuring the home is legally compliant and structurally sound.
Phase 2: Breaking Ground and Setting the Foundation
When the permits are issued, the work begins. This phase is visceral, and you will see heavy machinery clearing trees, rocks, and debris to level the building pad.
The foundation is the most critical component of the home. First, footings are poured, which are wide sections of concrete reinforced with rebar that sit below the frost line to prevent the house from settling. Once the footings are set, the builder installs rough plumbing and electrical chases.
Finally, the slab is poured. If your home has a basement, the walls are formed and poured during this window. Seeing the slab for the first time is a milestone, though many homeowners are surprised by how small the footprint looks at this stage; this is an optical illusion that disappears once walls go up.
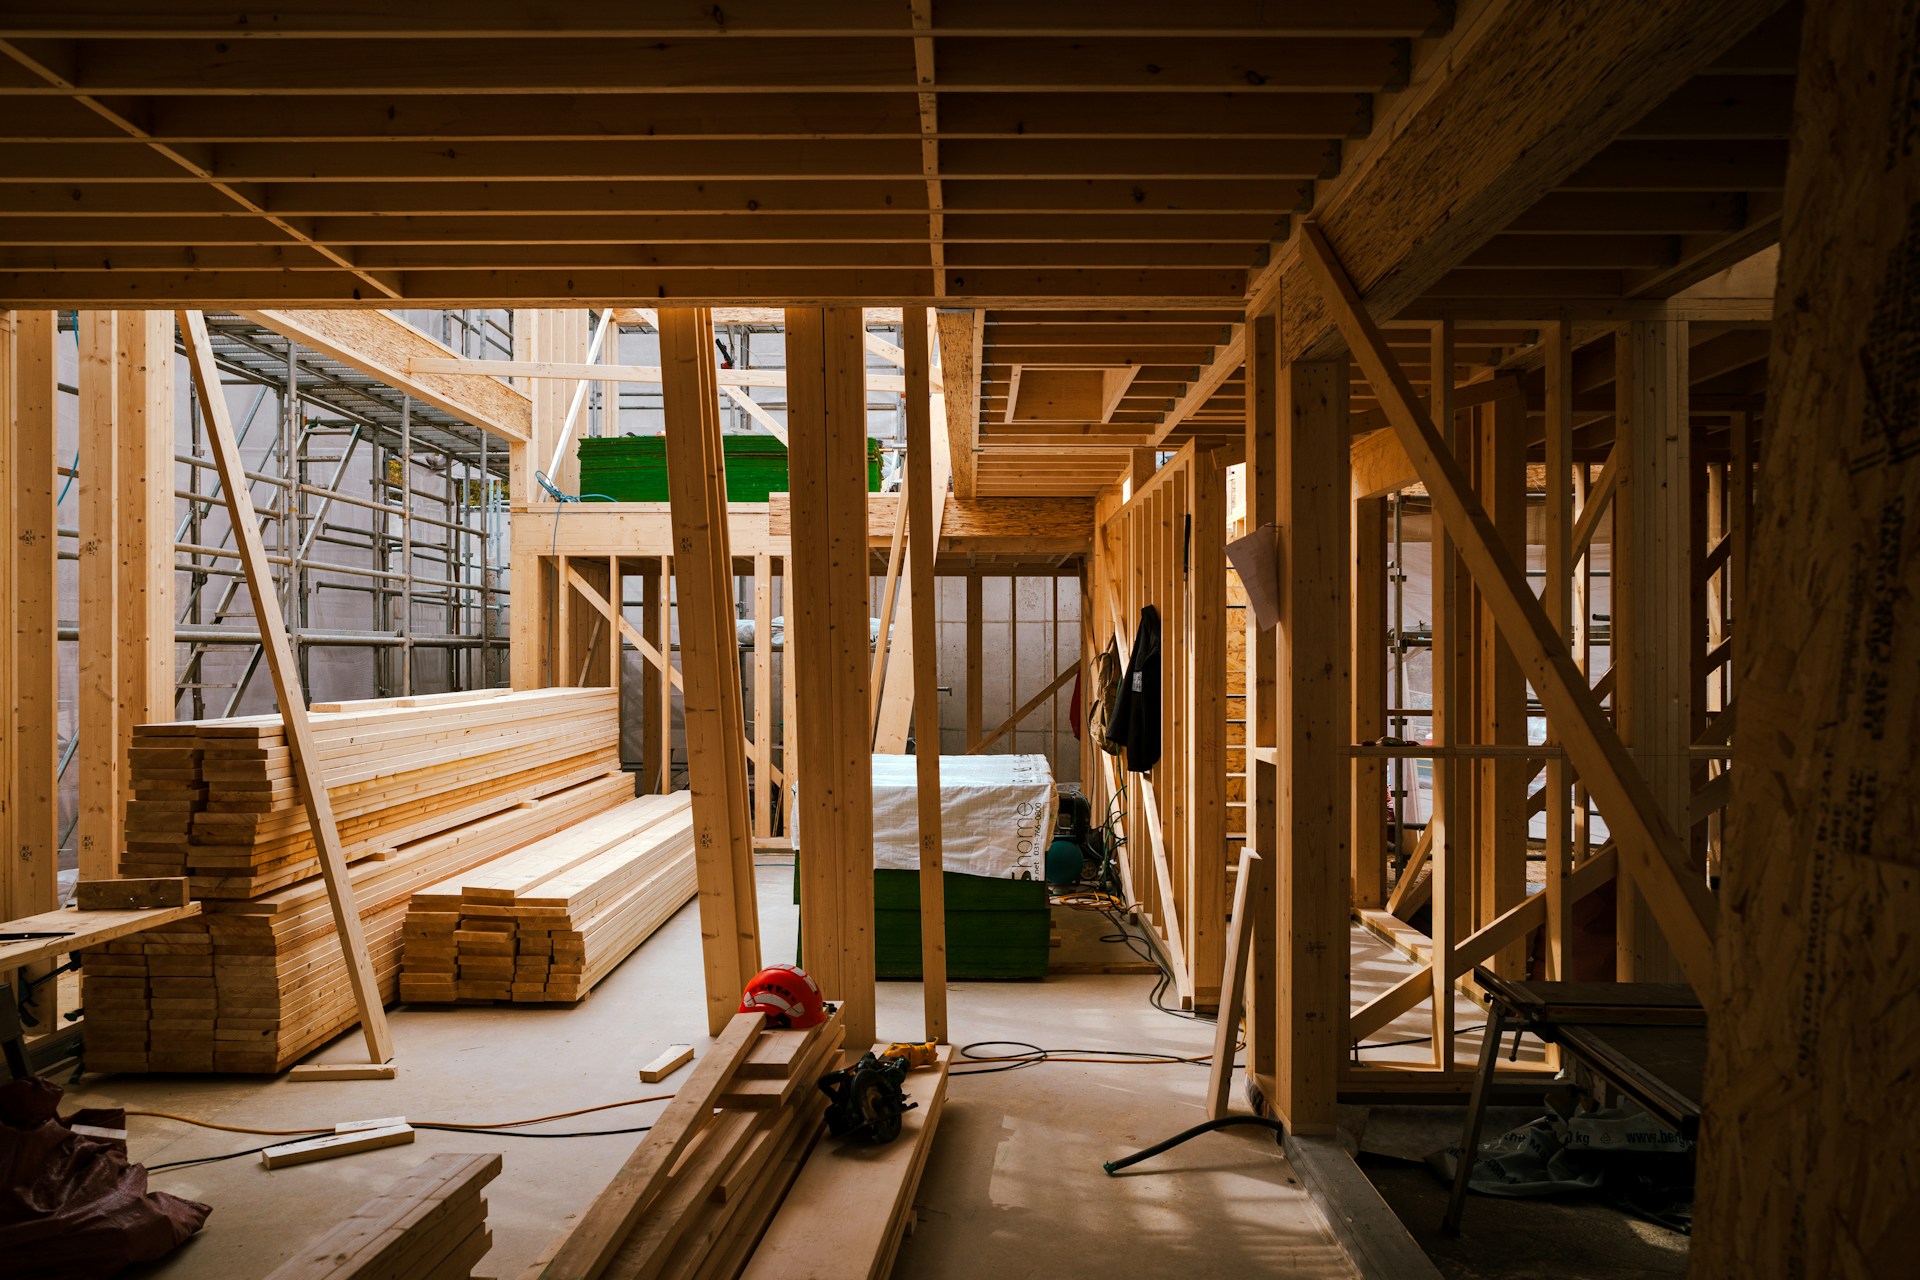
Phase 3: The Skeleton (Framing)
Framing is the fastest-moving phase of construction. In just a matter of weeks, the skeleton of the house rises. This includes the floor joists, the interior and exterior wall studs, and the roof trusses.
Once the frame is up, it is wrapped in sheathing, which is usually plywood or OSB, and a protective house wrap. This vapor barrier is crucial for moisture control.
At the tail end of this phase, windows and exterior doors are installed, and the roof is shingled. Builders call this being dried-in. Once the home is dried-in, interior work can proceed regardless of the weather outside.
Phase 4: The “Innards” (Rough-Ins and Mechanicals)
With the shell protected from the elements, the trades arrive. Electricians, plumbers, and HVAC technicians crawl through the studs to install the inside of the home. This includes ductwork for heating and cooling, water supply lines and sewer pipes, electrical wiring, security systems, and smart home hubs.
Before the walls are closed, a pre-drywall inspection occurs. A city inspector must verify that the wiring and plumbing meet safety codes. Many savvy homeowners also hire a private third-party inspector at this stage to ensure that no studs are notched incorrectly and that every mechanical component is placed according to the plan.
Phase 5: Closing the Walls (Insulation and Drywall)
Insulation is the silent hero of home comfort. Depending on your climate and budget, builders will use fiberglass batts, blown-in cellulose, or spray foam. This is the last time you will see the interior of your walls, so this is the best time to take reference photos of where every wire and pipe is located for future renovations.
Next comes the drywall. This stage is messy and labor-intensive. Large sheets are hung, taped at the seams, and mudded with joint compound. After several rounds of sanding, the rooms finally take their permanent shape. The echo of the house changes, and the scale of the rooms becomes clear.
Phase 6: Interior Artistry (Finishes)
Now, the house begins to reflect the personality you chose in Phase 1. This phase follows a specific order to protect the materials. First is the interior trim installation, including the baseboards, window casings, and doors.
Then the kitchen cabinets and bathroom vanities are bolted to the studs. Next, the walls receive their primary coats of color. The tile and hardwood flooring are laid after that. Finally, the countertops, where large slabs of stone or quartz are templated and installed.
Phase 7: The Trim-Out and Exterior Completion
The trim-out refers to the installation of the visible parts of your mechanical systems. This includes your light fixtures, outlet covers, faucets, toilets, and the HVAC condenser unit outside.
Simultaneously, the exterior of the home is finalized. Whether it is brick, stone, siding, or stucco, the facade is completed. The driveway is poured, and the landscaping is planted. This is the stage where neighbors start to stop by and admire the progress.
Phase 8: The Final Stretch (Inspections and Handover)
As construction nears 100%, the home undergoes a series of final checks. The building department performs a final inspection to issue a Certificate of Occupancy (CO). Without this document, you cannot legally move in.
About a week before closing, you will do a Homeowner Orientation, also known as a walkthrough. Armed with blue painter’s tape, you and the builder will look for minor imperfections, such as a scratch on a window, a squeaky floorboard, or a missed spot of paint. The builder then works to clear everything before the final signing.
Finally, you reach the closing. You sign the mortgage papers, the deed is recorded, and the keys are placed in your hand.
Redefining the Homebuilding Process With Immersive Homes
The traditional homebuilding process is a test of patience, but it doesn’t have to be a leap of faith. Immersive Homes revolutionizes this journey by replacing flat blueprints with 1:1 virtual reality walkthroughs, allowing you to experience your sanctuary before the first shovel hits the dirt.
By combining cutting-edge VR design with precision steel-frame technology and efficient off-site fabrication, they slash timelines without sacrificing quality. Ready to eliminate the guesswork and fast-track your move-in day? Partner with Immersive Homes to turn your vision into a reality you’ve already walked through.